Ready to use your blender to create easy and delicious meals, snacks, smoothies, condiments, cocktails and treats? Grab our Ultimate Healthy Blender Recipes eBook Bundle - Now 62% OFF!
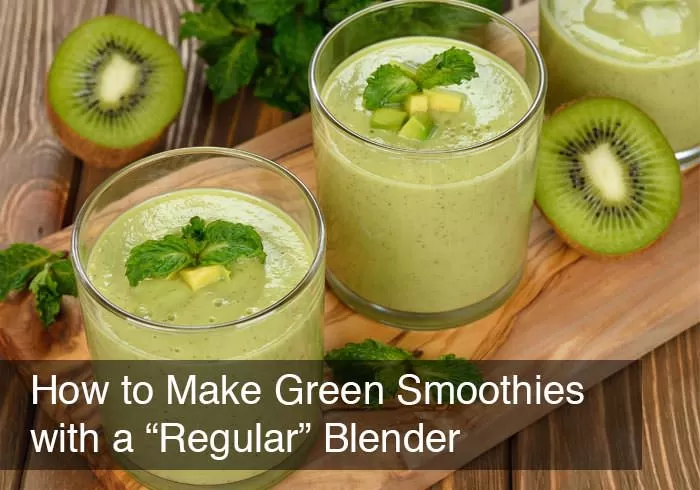
How to Make Green Smoothies
Do you find yourself having difficulty making good green smoothies with your current blender??
Green smoothies are suppose to be smooth. When they are chunky or lumpy or stringy, the drinking experience is no longer pleasurable.
Of course, Blender Babes recommends that you upgrade to one of the two best high powered blenders on the market, however if upgrading is not likely right now, then follow this advice to help make smoother green smoothies when using a basic blender.
Step 1. Always add the liquid first
Filtered water, coconut water, and milk substitutes (such as almond, coconut or soy milk) are the top choices Blender Babes recommends, followed by juice or regular milk.
This is because most fruit juices are high in unhealthy sugars and add unnecessary calories to your smoothie. (Another option is half juice & half water, to help with sweetness).
By adding liquids first, your blender can better produce a “vortex” that will pull fruit and leafy greens into the blades and more easily blend your smoothie ingredients.
Dependant upon your blender, the types of fruit and veggies you add, and whether the fruit is fresh or frozen, Blender Babes recommends using anywhere from 6 to 8 ounces of liquid for regular smoothies and 12 to 16 ounces of liquid for more “green” smoothie recipes.
Typically for highly green smoothies, meaning lots of leafy greens, or the more frozen fruit you use, the more liquid you will need.
Step 2. Chop & dice your fruit and vegetables
First with a sharp knife, including shredding the greens.
The less powerful your blender is, the finer you will need to chop your ingredients (a MINIMUM of 1 inch pieces, preferably smaller if your blender is around 300 watts).
Note that with a Blendtec or Vitamix blender, it’s mostly unnecessary to chop things up and saves you A TON of time.

Step 3. Add fresh fruit next
Fresh only, frozen fruit is last with ice.
When you make a green smoothie, make sure to add the fruit before the greens.
Also if you plan to use yogurt, add it after the fruit and before the greens.
If you add greens before the fruit, they will typically bottle-neck in the middle of your blender jar and can’t reach the blades. B
y having the fruit first, this will result in a more powerful vortex because the fruit puree will pull the greens towards the blades.
Step 4. Make use of the pulse button
If there is one before starting to blend.
The pulse feature further chops/breaks up the ingredients which will help to get things going.
It may also help dislodge pieces of fruit that may get stuck in the blades.

Step 5. Using different blending speeds
More easily blends the fruit and greens in a green smoothie.
Many people start by blending on high (seems logical to us too!) however they usually find they must stop it half way through, use a spoon to move all the ingredients around again, then again run it on high to finish blending.
INSTEAD, try this. After pulsing, start blending on low, then increase to high after 20 to 30 seconds.
If you still find you need to push ingredients down or around, make sure to stop the machine first and then again start from low to high.
Adding extra liquid is also recommended if your blender is still having a hard time with your green smoothie.
 IF THAT’S NOT WORKING

If you have a low wattage blender (around 300 watts) your best option to try if the previous instruction is proving to be too tough on your blender, is to blend your liquid and fruit first (pulse first then low to high), THEN add your greens in small batches, and lastly add ice.
Also keep in mind the type of greens you are using.
Spinach is softer than kale, for example, which will definitely need to have the hard stem cut out of it, and then the leaves cut into bite-size pieces before blending.
Also, remember to rotate your greens to avoid toxic buildup for healthy smoothie recipes!
Average blender is around 300 watts, costs between $30-$50, and almost always burn out fairly quickly.
The next up is around 700 watts, is definitely more powerful, but you still must chop & dice solid foods and greens up very small.
These blenders cost anywhere from $85–$150 and usually have a one year warranty.
With heavy use (such as frequent green smoothies) these will also burn out and need replacing every year or two…
FINAL THOUGHTS
That said, the overall savings in the long run by upgrading to a commercial grade 1100-1560 watt blender such as a REFURBISHED LIKE NEW Vitamix or Blendtec BLENDER – each comes with a five (5) or seven (7) year warranty (respectively) and have life expectancies of 15-20 years – is something to consider if you wish to continue with a healthier lifestyle.
Always enjoy FREE SHIPPING + a FREE GIFTS from Blender Babes with your purchase. 🙂
If upgrading your blender is not likely for now – put it on your wishlist! – and try these tips for smoother, green smoothies.
HAPPY BLENDING!!